Wednesday, October 29, 2014

Set up email in Mozilla Thunderbird with Office 365 Account


Set up email using Mozilla Thunderbird 8.0

  1. Open Mozilla Thunderbird. The Mail Account Setup dialog box will open the first time that you open Thunderbird. If the Mail Account Setup dialog box doesn't open, do the following:
    1. On the Tools menu, click Account Settings.
    2. On the Account Settings page, under Account Actions, click Add Mail Account.
  2. In the Mail Account Setup dialog box, do the following:
    1. In the Your Name box, enter the name that you want to appear on the "From" line in your outgoing messages.
    2. In the Email Address box, enter your email address.
    3. In the Password box, enter your password. Click Continue if you're using a Windows computer or click Next if you're using a Mac. Thunderbird will try to find the settings you need to configure for your account.
  3. Click Stop, or wait for Thunderbird to try to find your account settings. You’ll see the message: "Thunderbird failed to find the settings for your email account."
  4. The IMAP check box, next to Incoming, is selected by default and is recommended. In the Server hostname box, enter the name of your incoming server. If you’re connecting to your Office 365 email, the IMAP or POP server name is outlook.office365.com. If you’re not using Office 365, see Find your POP3 and IMAP4 server settings later in this article.
 Note    Leave the Port option set to Auto. Leave the SSL and Authentication options set to Autodetect.
  1. In the Server hostname text box, next to Outgoing, enter your SMTP server name. If you’re connecting to your Office 365 email, the SMTP server name is smtp.office365.com. If you’re not using Office 365, see Find your POP3 and IMAP4 server settings later in this article.
 Note    Leave the Port option set to Auto. Leave the SSL and Authentication options set to Autodetect.
  1. In the Username box, type your complete email address. For example, tonysmith@contoso.com.
  2. Click the Re-test button. If you see the message "The following settings were found by probing the given server,” click Create Account. A page opens that lets you view or change other Thunderbird settings. Click OK when you've finished viewing or changing the settings. If you’re unable to connect, see “What else do I need know?” later in this topic.
 Note    If you're using POP, under Server Settings, it's a good idea to select Leave messages on the server. After you select this check box, a copy of the messages you retrieve to your local computer will be kept on the server. You’ll also be able to access your messages from a different mail application.

Find your POP or IMAP server settings

If you’re connecting to your Office 365 email, you don’t need to look up your settings. For Office 365, the server name for IMAP and POP is outlook.office365.com and the server name for SMTP is smtp.office365.com.
If you’re not connecting to Office 365 email, do the following to look up your settings.
  1. Sign in to your account using Outlook Web App. For help signing in, see Sign in to Outlook Web App.
  2. In Outlook Web App, on the toolbar, click Settings GearIcon > Options > Account > My account > Settings for POP or IMAP access.
  3. The POP3, IMAP4, and SMTP server name and other settings you may need to enter are listed on the Settings for POP and IMAP Access page under POP setting or IMAP setting, and SMTP setting.

What else do I need to know?

  • If you don't know whether to use POP3 or IMAP4, consider using IMAP4 because it supports more features.
  • If your email account is the type that requires registration, you must register it the first time you sign in to Outlook Web App. Connecting to your email account through POP3 or IMAP4 will fail if you haven't registered your account through Outlook Web App. After you sign in to your account, sign out. Then try to connect using your POP3 or IMAP4 program. For more information about how to sign in to your account using Outlook Web App, see Sign in to Outlook Web App.
  • If you’re using an incoming POP3 server, you can only synchronize your Inbox folder. If you’re using IMAP4, you can choose the folders that you want Thunderbird to synchronize with the server. Remember that IMAP4 doesn’t support the synchronization of the Contacts and Calendar folders. Thunderbird uses a folder named Sent to store sent items. Exchange and Outlook Web App use a folder named Sent Items. You can synchronize the email items that you’ve sent in Thunderbird with the Sent Items folder on the Exchange server. To do this, follow these steps:
  1. In Thunderbird, in the console tree, select your email account. In the details pane, under Advanced, click Manage Folder Subscriptions. In the Subscribe dialog box, select the Sent Items check box, and then click OK.
  2. In Thunderbird, on the Tools menu, click Account Settings.
  3. In the navigation pane of Account Settings, select Copies & Folders for your email account.
  4. In the details pane, under When sending messages, automatically, select Other. In the drop-down list, select your user name, select Sent Items, and then click OK.

Tuesday, October 28, 2014

How to Enable / Disable Multiple RDP Sessions in Windows Server 2008,2008 r2, 2012

If only one session is available and you take over another person's live session, you may choose to enable multiple RDP sessions. This article describes the process for enabling and disabling multiple sessions.

Enable Multiple RDP Sessions
  1. Log into the server using Remote Desktop.
  2. Open the start screen (press the Windows key) and type gpedit.msc and open it
  3. Go to Computer Configuration > Administrative Templates > Windows Components > Remote Desktop Services > Remote Desktop Session Host > Connections.
  4. Set Restrict Remote Desktop Services user to a single Remote Desktop Services session to Disabled.
  5. Double click Limit number of connections and set the RD Maximum Connections allowed to 999999.
Disable Multiple RDP Sessions
  1. Log into the server using Remote Desktop.
  2. Open the start menu and type 'gpedit.msc' and open it
  3. Go to Computer Configuration > Administrative Templates > Windows Components > Remote Desktop Services > Remote Desktop Session Host > Connections.
  4. Set Restrict Remote Desktop Services user to a single Remote Desktop Services session to Enabled.

Wednesday, October 22, 2014

How to Install SSL Certificate on VMWare ESXi and vCenter Virtual Center

This article explains how to install SSL certificates on your ESXi machine & vCenter for browser compatibility.

First, on your Linux server, generate SSL certificate as explained below.
This will generate both private key and csr file. If you are generating certificate for multiple hosts, create separate directory for each host.

cd /tmp
mkdir your-esx-hostname
cd your-esx-hostname
openssl req -new -nodes -out rui.csr -config /tmp/openssl.conf

The above command will generate the following two files:
  • rui.key – Private key for this host
  • rui.csr – Certificate signing request file
For detailed steps, refer to how to generate SSL certificate article.
Use an sFTP Client (for example, winSCP) to download the directories you created to your workstation (c:\temp). These files then can be used to generate .cer file (certificate) which can be installed on ESXi. Move the .cer to the same directory as the .key to your workstation C:\temp\your-esx-hostname\

Install Certificates on ESXi

1. Put the host in maintenance mode.
2. Backup the old certificates.
3. Copy the new certificate and key. Open vCLI. Start > All Programs > VMware > VMware vSphere CLI > Command Prompt, and execute the following:
perl vifs.pl –server  --put C:\temp\your-esx-hostname\.cer /host/ssl_cert

perl vifs.pl –server  --put C:\temp\your-esx-hostname\rui.key /host/ssl_key
4. Reload the certificate. Login to DCUI Select Troubleshooting Options -> Select Restart Management Agents. Or, you can just reboot the host to reload the certificate.
5. Cleanup: Remove the backup from C:\temp on your workstation. Remove the \tmp\ directory from the linux server. Exit maintenance mode.
Finally, verify your certificate: Connect to the host with a web browser. You should not see any certificate errors. Click the “Lock” icon and select “view certificate”. Check the “valid from” date to ensure everything correct date.

Install Certificates on Your vCenter

1. Generate the CSR and the private key using the same steps outlined above using the Linux server. Replace ESX hostname with the vcenter hostname.
2. Use an sFTP Client (for example, winSCP) to download the directories you created to your workstation (c:\temp)
3. These files then can be used to generate .cer file (certificate) which can be installed on vcenter. Move the .cer to the same directory as the .key to your workstation C:\temp\your-esx-hostname\
4. The .cer file which is generated must be uploaded back to the Linux which is used to generate the PFX file.
5. Using WinSCP, upload the .cer to the /tmp/ directory of the server.
6. SSH into the host, and do the following:
First, rename the certificate.
cd /tmp/
mv .cer rui.crt
Next, generate PFX using openssl command:
openssl pkcs12 -export -in rui.crt -inkey rui.key -name rui -passout pass:testpassword –out rui.pfx
Verify your PFX file. Enter “testpassword” whenever it prompts for a password. It may ask for the password more than once. If you see certificate details, the PFX has been generated correctly.
openssl pkcs12 -in rui.pfx –info
7. SCP rui.cer and rui.pfx file back to your workstation C:\temp\
8. This directory C:\temp\ should now contain 3 files: rui.key, rui.crt, and rui.pfx
9. RDP into the vCenter Server, and go to: %programdata%\VMware\VMware VirtualCenter\SSL
10. Create a new folder called “Backup” and move the existing rui.key, rui.pfx, and rui.crt to the Backup folder. Repeat for Inventory Services Certificates: E:\Program Files (x86)\VMware\Infrastructure\VirtualCenter Server\Inventory Service\ssl
11. Copy rui.pfx, rui.crt, and rui.key from your workstation to the following directories on the vCenter Server.
  • %programdata%\VMware\VMware VirtualCenter\SSL
  • E:\Program Files (x86)\VMware\Infrastructure\VirtualCenter Server\Inventory Service\ssl
12. Open a web browser on the vCenter Server and go to: http://localhost/mob/?moid=vpxd-securitymanager&vmodl=1
  • Click on reloadSSLCertificate
  • Click on Invoke Method
  • It should return void
  • Close the browser
13. To verify the certificate, open a web browser and enter the URL of the vCenter Server. There should be no certificate warnings.
14. Finally, to Cleanup the old certificates, do the following:
  • On the vCenter Server, browse to: %ALLUSERSPROFILE%\Application Data\VMware\VMware VirtualCenter
  • Open vpxd.cfg in wordpad.
  • Change the value of to false
  • Save and close the file.
  • Restart the vCenter Service:
  • Start > Administrative Tools > Services
  • Click on VMware VirtualCenter Server
  • Click Restart
  • Remove the backup from C:\temp.
  • Remove the \tmp\ directory from the Linux server.

Sunday, October 19, 2014

Turn your Ubuntu/Linux Mint into Personal Cloud with Tonido for Free

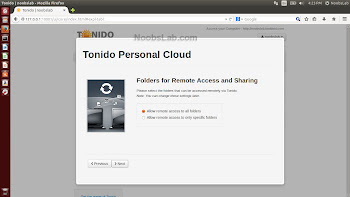
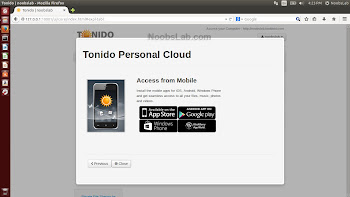
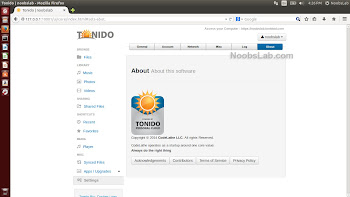
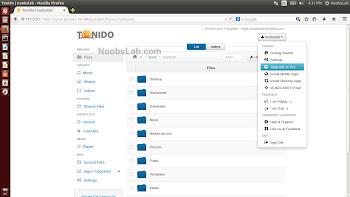
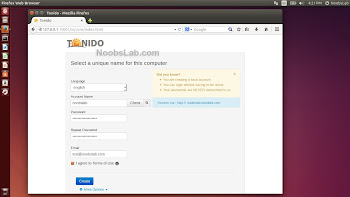
Tonido allows you to create secure home cloud server or allow remote access to your data. Once installed on a computer, Tonido software makes that computer's files available remotely via the internet through the web browser or through native mobile apps. It is easy to get started, just install the Tonido Desktop software and create a link to each computer you need access to. This is useful to get access to user's files, music and videos from anywhere as well as providing the capability to share files and folders with other people.
Tonido takes the approach of storing all user information including login credentials locally, providing login into Tonido software in the absence of internet connectivity. Since this software provides access to user's own storage without using public cloud services, it is considered as 'personal cloud'.

In addition to remote access, Tonido provides file synchronization capability, allowing users to sync files among multiple machines with their Tonido server. This synchronization unlike other synchronization products does not store or use the public cloud, keeping the user files private. Conveniently keeps the contents of a single folder in multiple computers (up to 2 GB*) in sync with your main computer, however, as synched data is relayed through Tonido's servers.

Works on all major operating systems, Windows, Linux, Mac, Raspberry Pi and works on major mobile phones and tablets including iPhone, iPad, Android, Windows Phone and Blackberry (Blackberry PlayBook). Share large files, folders or any content from your PC directly with family, colleagues or your clients or customers. Setup public direct links so anyone can access the content or create a secure private share that only authorized people are allowed to access them. By providing direct access to your files on your computer, you can rest assured that your data stays with you, providing complete privacy and control. Read here about Tonido privacy policy.

You get an easy to remember link to your computer. e.g.: http://username.tonidoID.com

Screenshots from Desktop


Screenshots from Android Mobile (Personal Cloud Accessed)


Tonido Features:
  • Video Streaming: Easily stream videos from your computer to your device.
  • Video Format support: Converts most video formats automatically (including AVI, MP4, MKV, VOB, XVID, WMV) - Live Video transcoding
  • Music Streaming: Stream your entire music collection in different formats (including FLAC, OGG, WMA, MP3 and more) without saving them locally on your device.
  • AirPlay Support: Stream Videos and Music to Apple TV using AirPlay
  • Remote File Access: Browse files and documents, download them locally, edit them and re-upload them back.
  • Download for Offline Use: Save documents, media locally so you can access them even without an internet connection
  • Sharing: Share selected files, music, media to guest users either by creating direct links to the files or by emailing the file directly
  • Create and Manage music playlists for your music
  • View photos (JPEG, PNG, GIF, CR2, NEF, CRW and more)
  • Wirelessly Download files directly to your mobile device and access it offline
  • Open your downloaded files using other installed applications
  • Take photos, videos and quickly upload to your home computer
  • It's FREE!

>> For 32bit (i386/i686) Architecture
To install Tonido in Ubuntu/Linux Mint open Terminal (Press Ctrl+Alt+T) and copy the following commands in the Terminal:


To uninstall from 32bit


>> For 64bit (x64/amd64) Architecture
To install Tonido in Ubuntu/Linux Mint open Terminal (Press Ctrl+Alt+T) and copy the following commands in the Terminal:


If you start Tonido and it doesn't work then run Tonido-Daemon icon (or run in terminal tonido-daemon) and open web-browser -> enter this url http://127.0.0.1:10001
To uninstall from 64bit


That's it

How Open Source Can Save Your Business Money

Open source software is arguably the most flexible form of programming available. Open source means that the software is used for free by anyone and the source code – the actual lines of code that make up the software – is accessible by anyone for free. This means that it can be modified by anyone who knows how to code, according to Open Source Initiative. Systems like the Linux operating system or the WordPress web development platform are open source, so thousands of developers and programmers have worked with the code to develop and create plugins, add-ons, and other additional features not originally part of the software. In some cases, you’ll have to pay a licensing fee or a first time use payment in order to use open source software, but in many other cases, it’s completely free, allowing you and your business to save money by using it.

Open source software can be used in a number of different applications, but it isn’t capable of dealing with all situations. If you run a business with an online store aspect, you’ll have a wide choice of what sort of eCommerce software you would like to use to run the store. You can pay a licensing fee and use an eCommerce software system like that offered by Shopify or you can search for free plugins (granted that you’re using WordPress or another open source platform that has eCommerce plugins).

Additions and Add-ons Galore

The best feature of open source software is all the additional plugins you can add on for free. The older the base software is, the more choices you will have to pick from. Because of the nature of open source, programmers and developers from around the world will have the opportunity to examine the source code of the software and fiddle with it however they please. Thanks to this aspect of the software, thousands upon thousands of people have had the chance to modify the code according to their own, different ideas. This has led to advances and modifications that the original developers might never have even contemplated. The myriad angles and viewpoints that other programmers view the code with has allowed growth and development in open source projects unlike anything that can be accomplished through a single entity, be it corporation or group of developers.

Using open source technology doesn’t necessarily mean you need to use Linux for your OS or WordPress for your operating system. According to CNet, an open source alternative to Microsoft Office Suite has now claimed to have over 80 million users worldwide. LibreOffice is a suite of applications akin to Microsoft Office with a word processor, PowerPoint-style application, spreadsheet program, and more. But instead of buying the latest version of MS Office for hundreds of dollars, you can get LibreOffice for free. Thanks to open source platforms and programs, it’s possible for you to save yourself and your business money through using alternatives like LibreOffice instead of paying lots of money for the more well-known branded software suites.

Multiple Systems for Multiple Jobs

Chances are that you won’t be able to find an open source alternative for all the systems you use in your business; you will certainly be able to find some, more depending on what base systems you run, but for others you will have to stick to either proprietary software of licensed software. Which software and programs works best where is something you will need to look into and do some research on. There are a lot of open source applications available and even more add-ons to them, so it will require some work on your part to sift through the programs you don’t want or need to find the useful ones. As long as you’re willing to spend the time doing the research, you will definitely be able to save your business some money, as in the case of using LibreOffice instead of MS Office.

An incredibly important tool you should definitely have is a barcode printer and scanner. If you run a purely online eCommerce site then the necessity of a barcode printer isn’t nearly as drastic as it is if you run a physical store. There are barcode and label printing applications available for open source system like Linux. According to LWN, barcode applications like KBarcode are available for free and offer features like optional database support, built-in label definitions, rich text and graphical editors, and more. But a system like that requires you to be running Linux or KDE3 as your business OS and that isn’t always the case. Conversely, you can purchase a mobile barcode printer like the ones offered by Shopify that sync together with a smartphone app. The choice is not cut-and-dried; you can't just list whether one system is better than another system. All the systems available have their strengths and weaknesses and so it’s up to you to figure out which is the best and most efficient for your business.

Display Android Notifications On The Ubuntu/Linux Mint Desktop (LinConnnect Opensource Solution)

LinConnect is a great project to display Android notification on a Linux desktop using LibNotify, it is written in python programming language. LinConnect runs as private server on a Wi-Fi network for the Linux desktop and Android client application which installs on Android device, Android pushes the notifications through the LinConnect-client application to the Linux desktop. There is another great feature available within in Android client application that you are free to choose apps to display notification using LinConnect client application (It works with almost all Android applications). This project is in active development, which means you may can face bugs, I haven't faced any problem with it yet.

linconnect
Simply it stops you to check every notification on your Android phone, so you can decide that notification is important to check or not. It is also a very convenient way to get all kind of notifications on your Linux desktop like email, text message, now playing, and such others.

Features:
  • Handy notification on Linux desktop
  • Extremely simple setup
  • Icons from notifications displayed on desktop
  • Uses LibNotify and Python (more compatibility, less dependencies)
Notification when server starts, and server auto-start on every reboot

Test Notification sent from LinConnect Android app while connecting

Message Notification

Incoming Call notification

Recent notifications indicator stores notifications to check later

LinConnect client Android application


Note: This application is still in early stages and does not yet support encryption. You can report bugs to developer.
Install Android Client from here.

To install LinConnect Server in Ubuntu/Linux Mint open Terminal (Press Ctrl+Alt+T) and copy the following commands in the Terminal:


While running installation script will ask you to start LinConnect server "yes" or "no", if you accidentally select "no" then run following command in terminal to start the server:


Server automatically starts on every boot.

If you want to uninstall then simply run this command:


That's it

Share Files/Folders/Messages Using Cross-Platform 'Dukto' Application, Available For Ubuntu/Linux Mint

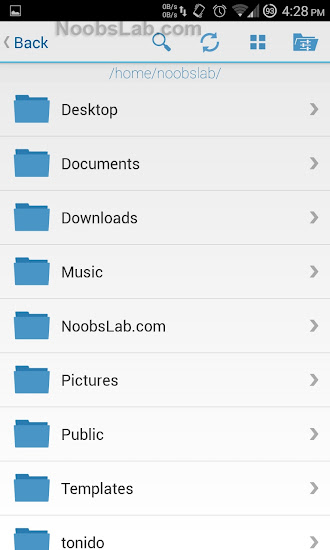
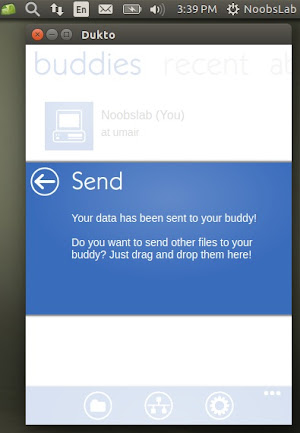
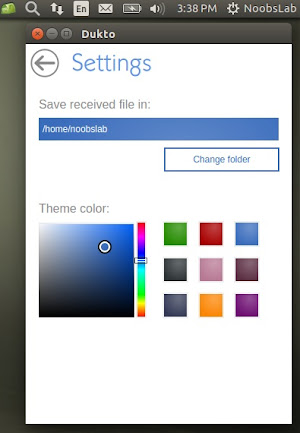
Dukto is easy multi-platform file and text transfer tool, licensed under GNU General Public License. Dukto is an easy file transfer tool designed for LAN use. You can use it to transfer files from one PC to another, without worrying about users, permissions, operating systems, protocols, clients, servers and so on. Just start dukto on the two PCs and transfer files and folders by dragging onto it's window.
One of the main changes of this release is the new user interface inspired to the Metro style UI developed by Microsoft for the new releases of Windows Phone, Windows, Xbox and all the other Microsoft products. It supports Linux, MS Windows, OS X, iOS, Android and more.

Main features:

  • Simple user interface
  • No server or internet connection needed
  • Zero configuration
  • Clients auto-discovery
  • High speed file transfer
  • Multi-OS native support
  • Portable version available
  • Multi files and folders transfer
  • Transfers log
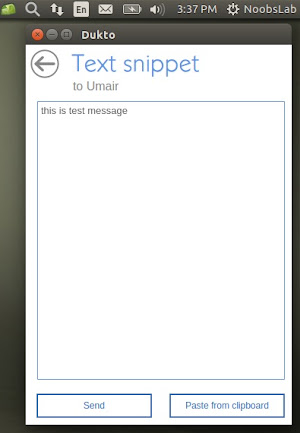
  • Send and receive text snippets (eg. useful for sending URLs)
  • Open received files directly from the application
  • Show your IP addresses on the IP connection page
  • Full Unicode support
  • Metro style UI
  • Free and open source

Screenshots


Officially it is released for following platforms:
  • Windows (XP or later)
  • OS X (10.6.x or later)
  • Linux
  • Android
  • Symbian (for Nokia touch phones)
  • Unofficial releases also available (Blackberry Playbook, iOS, Maemo)
  • Also source is available on project page

>>For Ubuntu 14.04 Trusty/14.10 Utopic/Linux Mint 17
If you don't want to add following repository then download deb files for Ubuntu 14.04/14.10/Linux Mint 17
(32bit/i386)(64bit/amd64)

To install Dukto in Ubuntu/Linux Mint open Terminal (Press Ctrl+Alt+T) and copy the following commands in the terminal:


>>For Ubuntu 12.04 Precise/Linux Mint 13
If you don't want to add following repository then download deb files for Ubuntu 12.04 Precise/Linux Mint 13
(32bit/i386)(64bit/amd64)

To install Dukto in Ubuntu/Linux Mint open Terminal (Press Ctrl+Alt+T) and copy the following commands in the terminal:


That's it

How To Install VMware Player In Ubuntu/Linux Mint/Any Debian Derivative (Auto Installation)

VMware player is virtualization product just like VirtualBox. It is offered free of charge for personal use by VMware corporation. VMware Player can run existing virtual appliances and create its own virtual machines (which require an operating system to be installed to be functional). It uses the same virtualization core as VMware Workstation, a similar program with more features, but not free of charge. Instead of buying and shipping hardware, simply provide use VMware Player along with a virtual machine containing your standardized desktop image.
VMware claims the Player offers better graphics, faster performance, and tighter integration than any other solution for virtualization.


vmware player linux

vmware player

Features:
  • Can run multiple operating systems on a single PC
  • Share data with host system & virtual machine
  • 32bit & 64bit virtual machines support
  • Leverage 2-way Virtual SMP
  • Use 3rd-party virtual machines and images
  • Broad host and guest operating system support
  • Support for USB devices
  • Gain easy access to virtual machines via intuitive home page interface

I wrote a script to automate the installation, you just need to enter three commands and just few clicks to get it install. Also keep in mind that always read a script before executing in your system.

To install VMware Player in Debian/Ubuntu/Linux Mint/Ubuntu derivatives open Terminal (Press Ctrl+Alt+T) and copy the following commands in the Terminal:


If you want to uninstall Vmware Player from your system then enter following command in terminal:


That's it

3 Barcode Programs For Linux You Should Check Out

There are a lot of different barcode printers out there and just about as many different kinds of barcode software, if not more. Macs, PCs, and Linux systems all have unique kinds of software used for barcode printing. Some of these programs can give a regular printer the capability to print barcodes while other programs work to integrate specific barcode printers with the OS being used. The following list contains some of the more commonly used programs for barcode printing off a Linux based system.

Depending on the OS you use, some barcode printers might not work. When you purchase your barcode printer (if you get a printer specifically designed for barcodes, like the one offered by Shopify), you'll have to check to make sure it's compatible with your systems OS and any other hardware and software you use. If you don't perform this check, you just may find yourself with a barcode printer that doesn't work with your system.

TBarCode/X

TBarCode/X is one of the programs that transforms a regular printer into a barcode printer. It doesn't lose the normal capabilities to print, however, so there's no need to worry about making your printer a one-trick pony. According to Tec-It, the TBarCode/X software can be used to create barcodes in these five areas:
  • Barcode extension for print and spool servers
  • Barcode printer server for SAP, R/3, ORACLE, and any other ERP applications you might use.
  • Barcode engine for document management requirements and logistics software.
  • Barcode printing software for VDA 4902, ODETTE, and AIAG B-10 forms.
  • Barcode generator for web and cellular phone applications.
It's a versatile piece of software that works on Linux, UNIX, and OS X systems. Additionally, TBarCode/X has a very extensive program library called LibTBarCode that can greatly help in barcode generation in Bitmap, PostScript/EPS, and PCL formats. The best part is that this library can be directly integrated into your system so you can use the TBarCode command line to provide commands.

GNU Barcode

GNU Barcode is a piece of software that can be used to directly convert a text string into a barcode. The type of barcode you wish to use is up to you as GNU can support a wide variety of standard code types. According to GNU, the main features of GNU Barcode are:
  • Available as a library and an executable program depending on your specific needs.
  • It supports UPC, EAN, ISBN, CODE 39 and multiple other common encoding standards.
  • It has the capability to output both Postscript and Encapsulated Postscripts.
  • Has multiple measurement unit inputs including inches, centimeters, and millimeters.
  • Has the ability to create a table of barcodes for easy printing onto sticker sheets and other bulk pages.
An interesting aspect of the GNU Barcode system is that GNU is actually much more than just a program for creating and printing barcodes. GNU's about articles discuss how the GNU operating system is actually, in many cases mistaken as just Linux. That's not to say that all Linux OSes are based on the GNU OS, but a number of them use more of GNU than many people realize. The specifics of the relationship are complicated and it deals with how Linux as a whole is developed and run. Since Linux is an open source piece of software, anyone can access the source code to work on development and creating modifications and changes. Because of the nature of Linux, many people that use Linux don't realize that, while the kernel (defined by webopedia as the small center of an OS that starts first and constantly remains in the main memory) itself is unarguably Linux, the rest of the OS might be something else, like GNU.

Zint Barcode Generator

Zint Barcode Generator is a piece of barcode software that was actually in hibernation for quite some time as the developers left to work on other projects. But, according to Source Forge, the program has been resurrected and is in use again. Zint.github states that the Zint Barcode Generator is an encoding library for barcodes that supports over 50 different symbologies. Some of the supported types include Data Matrix, USPS OneCode, UPC/EAN, ITF, QR Codes, Maxicode, Aztec, LOGMARs, and plenty others. The Zint user manual states that Zint is a project designed to provide a cross-platform barcode generation solution that is completely open source. It is a program you could use without much knowledge of coding or Linux, but you probably want to tread carefully if you decide to use it.

If you're using some iteration of Linux as your OS, you probably have at least some knowledge of programming and coding. That knowledge can be incredibly useful when using these programs as some of them have very intricate systems and abilities that the average user might not be able to understand. Regardless of your experience and knowledge, it's absolutely imperative that when you plan on using some software for barcode creation that you make sure your hardware is compatible. Paying for licensing fees and then realizing your stuff doesn’t work together is a good way to waste money and breed frustration.

Ubuntu 14.10 Utopic Unicorn (Final Beta) has been Released

The Ubuntu team has announced the availability of Ubuntu 14.10 Utopic Unicorn final beta "The Ubuntu team is pleased to announce the final beta release of Ubuntu 14.10 Desktop, Server, Cloud, and Core products. This beta release includes images from not only the Ubuntu Desktop, Server, Cloud, and Core products, but also the Kubuntu, Lubuntu, Ubuntu GNOME, Ubuntu Kylin, Ubuntu Studio and Xubuntu flavours. Utopic final beta includes updated versions of most of our core set of packages, including a current 3.16.2 Linux kernel, AppArmor improvements, and many more." Read here complete release announcement.


Download:
32bit - Ubuntu-14.10-beta2-desktop-i386.iso (1.1GB - Torrent)
64bit - Ubuntu-14.10-beta2-desktop-amd64.iso (1.1GB - Torrent)

32bit - Kubuntu-14.10-beta2-desktop-i386.iso (1.0GB - Torrent)
64bit - Kubuntu-14.10-beta2-desktop-amd64.iso (1.0GB - Torrent)

32bit - Lubuntu-14.10-beta2-desktop-i386.iso (704MB - Torrent)
64bit(PC) - Lubuntu-14.10-beta2-desktop-amd64.iso (703MB - Torrent)
64bit(Mac) - Lubuntu-14.10-beta2-desktop-amd64+mac.iso (635MB - Torrent)

32bit - Ubuntu-gnome-14.10-beta2-desktop-i386.iso (1.0GB - Torrent)
64bit - Ubuntu-gnome-14.10-beta2-desktop-amd64.iso (1.0GB - Torrent)

32bit - Ubuntustudio-14.10-beta2-dvd-i386.iso (2.2GB - Torrent)
64bit - Ubuntustudio-14.10-beta2-dvd-amd64.iso (2.1GB - Torrent)

32bit - Xubuntu-14.10-beta2-desktop-i386.iso (1.0GB - Torrent)
64bit - xubuntu-14.10-beta2-desktop-amd64.iso(1.0GB - Torrent)

32bit - Ubuntukylin-14.10-beta2-desktop-i386.iso (1.3GB - Torrent)
64bit - ubuntukylin-14.10-beta2-desktop-amd64.iso (1.3GB - Torrent)

Install Google Web Designer In Ubuntu/Linux Mint/Other Ubuntu Derivatives

Google Web Designer is a free powerful tool to create beautiful HTML5 sites/content. It is cross-platform application available for Windows, Mac, and Linux. It allows rich content, advertising banners, for the web. The animation functions, drawing, and interactive elements, as well as 3D effects. Build interactive, animated HTML5 creative, no coding requied.
Within the program GUI contains design tools like Text Tool, Pen Tools, and Shapes, as well as integrating Google Web Fonts. It's components give projects added functionality using pre-programmed Web Components. Default components include iFrame, maps, tap area, image gallery, and YouTube. Plus, each component automatically reports metrics—no coding required. Events to connect your actions to physical gestures and make your creative react to touch, tilting, rotating, or shaking on smart devices. Use preset events, or build your own from scratch. Organize multiple states of a project using Pages and create as many Pages as your project requires. Use navigation between Pages to give your audience control of what they want to see or do next.
Animate by stringing together simple scenes in Quick mode or by using layers on a timeline in Advanced mode. You can even toggle between modes while animating. Create and manipulate 3D content using the power of CSS3. Rotate objects and 2D designs along any axis, visualizing 3D transformations and translations as you author. Streamline workflow by pushing files directly to Google Drive so you can share, edit, and collaborate remotely. Once you finalize an ad, get it out the door quickly by publishing to DoubleClick Studio or AdMob with a single click.

google web designer

google web designer

To install Google Web Designer in Debian/Ubuntu/Linux Mint/Ubuntu derivatives open Terminal (Press Ctrl+Alt+T) and copy the following commands in the Terminal:
>>> For 32bit


>>> For 64bit


That's it

3 Steps to Perform SSH Login Without Password Using ssh-keygen & ssh-copy-id

You can login to a remote Linux server without entering password in 3 simple steps using ssky-keygen and ssh-copy-id as explained in this article.

ssh-keygen creates the public and private keys. ssh-copy-id copies the local-host’s public key to the remote-host’s authorized_keys file. ssh-copy-id also assigns proper permission to the remote-host’s home, ~/.ssh, and ~/.ssh/authorized_keys.

This article also explains 3 minor annoyances of using ssh-copy-id and how to use ssh-copy-id along with ssh-agent.

Step 1: Create public and private keys using ssh-key-gen on local-host

James@local-host$ [Note: You are on local-host here]

James@local-host$ ssh-keygen
Generating public/private rsa key pair.
Enter file in which to save the key (/home/James/.ssh/id_rsa):[Enter key]
Enter passphrase (empty for no passphrase): [Press enter key]
Enter same passphrase again: [Pess enter key]
Your identification has been saved in /home/James/.ssh/id_rsa.
Your public key has been saved in /home/James/.ssh/id_rsa.pub.
The key fingerprint is:
33:b3:fe:af:95:95:18:11:31:d5:de:96:2f:f2:35:f9 James@local-host

Step 2: Copy the public key to remote-host using ssh-copy-id

James@local-host$ ssh-copy-id -i ~/.ssh/id_rsa.pub remote-host
James@remote-host's password:
Now try logging into the machine, with "ssh 'remote-host'", and check in:

.ssh/authorized_keys

to make sure we haven't added extra keys that you weren't expecting.
Note: ssh-copy-id appends the keys to the remote-host’s .ssh/authorized_key.

Step 3: Login to remote-host without entering the password

James@local-host$ ssh remote-host
Last login: Sun Nov 16 17:22:33 2008 from 192.168.1.2
[Note: SSH did not ask for password.]

James@remote-host$ [Note: You are on remote-host here]

The above 3 simple steps should get the job done in most cases.

We also discussed earlier in detail about performing SSH and SCP from openSSH to openSSH without entering password.

If you are using SSH2, we discussed earlier about performing SSH and SCP without password from SSH2 to SSH2 , from OpenSSH to SSH2 and from SSH2 to OpenSSH.

Using ssh-copy-id along with the ssh-add/ssh-agent

When no value is passed for the option -i and If ~/.ssh/identity.pub is not available, ssh-copy-id will display the following error message.
James@local-host$ ssh-copy-id -i remote-host
/usr/bin/ssh-copy-id: ERROR: No identities found

If you have loaded keys to the ssh-agent using the ssh-add, then ssh-copy-id will get the keys from the ssh-agent to copy to the remote-host. i.e, it copies the keys provided by ssh-add -L command to the remote-host, when you don’t pass option -i to the ssh-copy-id.
James@local-host$ ssh-agent $SHELL

James@local-host$ ssh-add -L
The agent has no identities.

James@local-host$ ssh-add
Identity added: /home/James/.ssh/id_rsa (/home/James/.ssh/id_rsa)

James@local-host$ ssh-add -L
ssh-rsa AAAAB3NzaC1yc2EAAAABIwAAAQEAsJIEILxftj8aSxMa3d8t6JvM79DyBV
aHrtPhTYpq7kIEMUNzApnyxsHpH1tQ/Ow== /home/James/.ssh/id_rsa

James@local-host$ ssh-copy-id -i remote-host
James@remote-host's password:
Now try logging into the machine, with "ssh 'remote-host'", and check in:

.ssh/authorized_keys

to make sure we haven't added extra keys that you weren't expecting.
[Note: This has added the key displayed by ssh-add -L]

Three Minor Annoyances of ssh-copy-id

Following are few minor annoyances of the ssh-copy-id.

  1. Default public key: ssh-copy-id uses ~/.ssh/identity.pub as the default public key file (i.e when no value is passed to option -i). Instead, I wish it uses id_dsa.pub, or id_rsa.pub, or identity.pub as default keys. i.e If any one of them exist, it should copy that to the remote-host. If two or three of them exist, it should copy identity.pub as default.
  2. The agent has no identities: When the ssh-agent is running and the ssh-add -L returns “The agent has no identities” (i.e no keys are added to the ssh-agent), the ssh-copy-id will still copy the message “The agent has no identities” to the remote-host’s authorized_keys entry.
  3. Duplicate entry in authorized_keys: I wish ssh-copy-id validates duplicate entry on the remote-host’s authorized_keys. If you execute ssh-copy-id multiple times on the local-host, it will keep appending the same key on the remote-host’s authorized_keys file without checking for duplicates. Even with duplicate entries everything works as expected. But, I would like to have my authorized_keys file clutter free.

If you like this article, please bookmark it on Delicious and Stumble it.

Friday, October 3, 2014

How to Speedup Linux Boot Process using Startpar Command Examples

In a typical scenario, during the boot process, the run-level system startup scripts are executed one-by-one.
A particular run level startup script will not execute until the previous script is executed completely. If a particular service during the startup is hanging for some reason, it might take a while before it times-out and move on to the next startup script.
Startpar utility is used to run multiple run-level scripts in parallel. This helps to speed up the boot process of your server.

Startpar utility is part of sysvinit package.
The general syntax for the startpar is given below:
startpar –p par –i iorate –t timeout –T global timeout –a arg prg1 prg2

startpar –p par –I iorate –t timeout –T global timeout –M boot|start|stop
The following are the various options of startpar:
  • -p Number of process to run in parallel.
  • -i Change the process block weighing factor. The default is 800.
  • -t Timeout to empty the buffer of a script if no output has occurred.
  • -T Global timeout. It is used to flush the buffer output of previous scripts .
  • -a Arguments to be provided to all scripts.
  • -M Switch startpar to the “make” mode.
  • -P Specify previous run-level
  • -N Specify next run-level
When startpar is executing the run-level scripts, the output of the scripts is buffered to allow for controlled writing to logging facilities.
If other scripts are running in parallel, then it waits for the logging to be completed and then it writes the data from buffer to the logging area. The –t and –T options are used to control the clearing of these buffers depending on the time since the last output that is captured to buffer.
On my system, I have the following version fo startpar:
# startpar -v
startpar version 0.54
Startpar command can be used in a “make” mode using –M option. In this mode, startpar uses the following files to decide how to execute the startup scripts.
/etc/init.d/.depend.start
/etc/init.d/.depend.stop
/etc/init.d/.depend.boot
Here’s an example of .depend.start file:
# cat /etc/init.d/.depend.start
TARGETS = halt fbset lvm_wait_merge_snapshot microcode.ctl earlysyslog dbus acpid random purge-kernels reboot network haldaemon boot.clock syslog ford_tso_off Sts splash_early haveged rpcbind multipathd nfs smbfs kbd irq_balancer alsasound mcelog network-remotefs sshd java.binfmt_misc clamd logd gpm ntp single atd clamav-milter canna amavis cups nscd postfix xdm cron smartd
INTERACTIVE = kbd ntp single
network: dbus
haldaemon: dbus acpid
syslog: network earlysyslog
ford_tso_off: network
Sts: network
splash_early: syslog
haveged: syslog random
rpcbind: syslog
multipathd: syslog
nfs: rpcbind
.
.
.
.
mcelog: smbfs
network-remotefs: smbfs haldaemon
In the “make” mode, startpar uses the .depend.start file to find which dependent services needs to be started in order to start to start a specific service.
In the above ouput, when startpar is executed with start mode using make option, the dependent scripts are started first before the scripts are executed in parallel.
Here’s an example how the startpar can be used in the make mode during system startup sequence,
# startpar -p 4 -t 20 -T 3 -M start -P N -R 2
D-Bus already started. Not starting.
Starting acpid                    done
Re-Starting syslog services       done
Starting service at daemon        done
Starting sound driver             done
Starting cupsd                    done
Starting CRON daemon/usr/sbin/cron: can't lock /var/run/cron.pid, otherpid may be 3506: Resource temporarily unavailable
startproc:  exit status of parent of /usr/sbin/cron: 1
                                  done
Starting irqbalance                                                       unused
HAL already started. Not starting.
Starting mcelog... already running                                        done
Setting up network interfaces:
    eth0      device: Intel Corporation 82545EM Gigabit Ethernet Co
    eth0      IP address: 19.86.xxx.xxx/24                                done
    eth1      device: Intel Corporation 82545EM Gigabit Ethernet Co
    eth1      IP address: 19.86.xxx.xxx/24                                done
Setting up service network  .  .  .  .  .  .  .  .  .  .                  done
Hint: you may set mandatory devices in /etc/sysconfig/network/config
Setting up (remotefs) network interfaces:
Setting up service (remotefs) network  .  .  .  .  .  .  .  .  .  .       done
Initializing random number generator                                      done
Starting smartd                                                           unused
Disabling TSO on all interfaces and adding ETHTOOL_OPTIONS to nic config files  done
Re-Starting syslog services              done
Starting haveged daemon                  done
failed_service="alsasound"
skipped_service="irq_balancer smartd"
In the above example, startpar is executed with the total number of 4 process to run in parallel with a timeout of 20 seconds , global timeout 3 seconds to empty the buffer area, -M in make mode with “start” option to indicate startup is being used in start sequence.
This will use /etc/init.d/.depend. start file to verify the scripts that are dependent on each other. –P is the previous run-level –N is the new runlevel.
Here’s another example to use startpar just to execute 2 scripts in parallel, you can also define this script on /etc/init.d/rc to ensure these scripts gets started in parallel during system startup if required.
# startpar -p 4 -t 20 -T 3 -a start /etc/init.d/ypxfrd /etc/init.d/drbd
Starting rpc.ypxfrd              done
Starting DRBD resources:
.
.
Also in some Linux distros, you can setup the system to use startpar option in /etc/init.d/rc file.
In the rc file, just change the value “CONCURRENCY=SHELL” to “CONCURRENCY=STARTPAR”, which should calculate the dependencies automatically and start the applicable scripts in parallel.
# vi /etc/init.d/rc
CONCURRENCY=STARTPAR